Sunday, April 19, 2015

Vim Script Quick Tip

Actually, this is about macros, but "macro" didn't rhyme with "quick", so deal with it.

The other day, a colleague asked me if I knew of a quick way to generate a list of hexadecimal numbers from 0000 through ffff. And I do, in Vim:

  • Start the buffer with 0x0000
  • Start a new macro using q and choosing any buffer name you like (I tend to go with d out of habit)
  • Yank the whole line
  • Paste it
  • Increment it using ctrl-a
  • Terminate macro recording
  • Execute the macro 65534 times
The commands look like this:

a0x0000
qd
yy
p
ctrl-a
esc
65534@d

And if you don't want the 0x prefix, then remove it using a single replace command:

:%s/0x//g

The reason I use the 0x prefix is to tell the ctrl-a (increment) command that the number format is hexadecimal and not octal, without having to diddle with the nrformats option.

On the other hand, if you increment numbers that are not prefixed, Vim will assume they are decimal, like this:
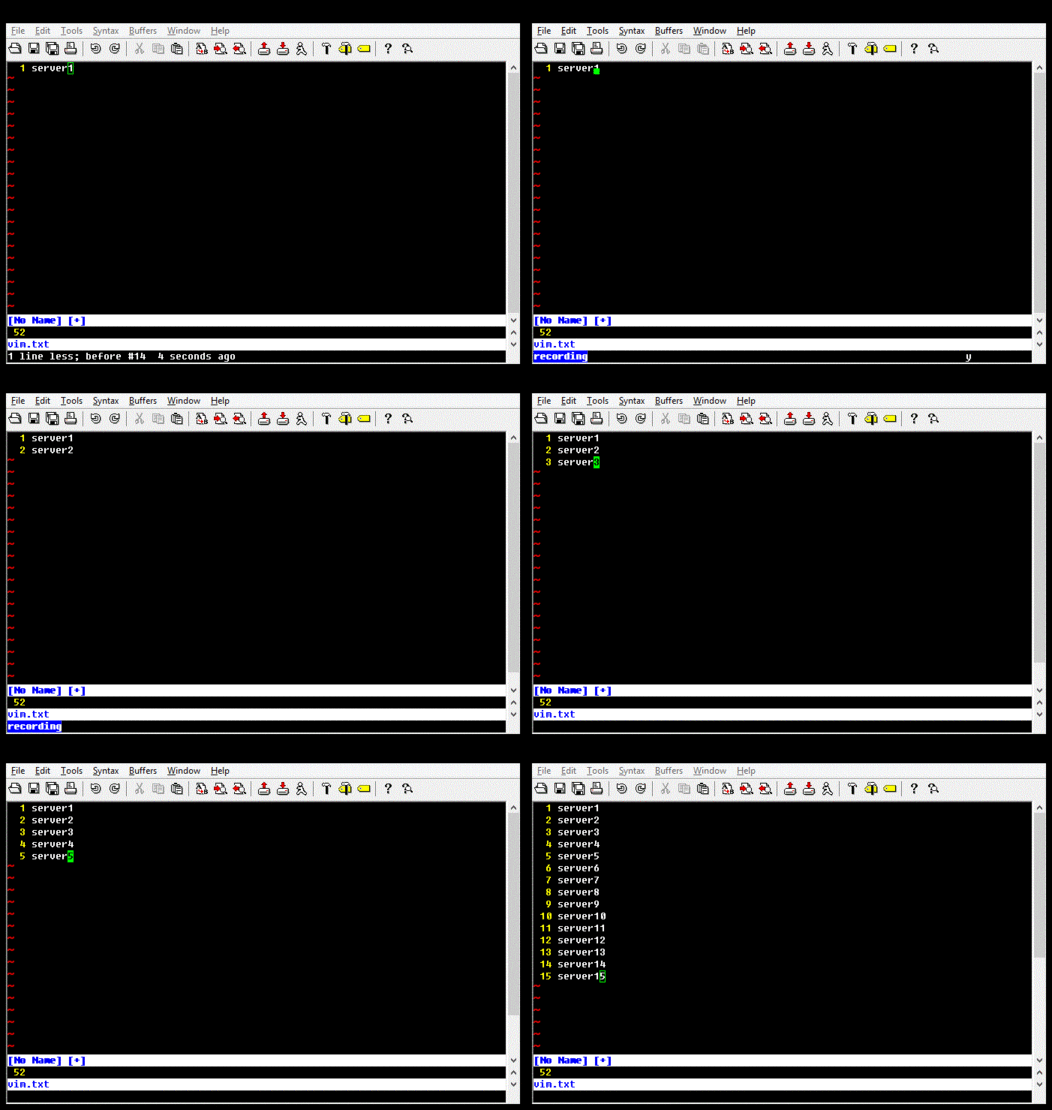

Also, if you want to decrement (as opposed to increment) numbers, you can use ctrl-x.

Happy Vimming.

Sunday, April 12, 2015

Dealing with Nmap output

Port scans of multiple hosts typically result in a lot of information that I'd rather have in a spreadsheet. If you use the -oX or -oA Nmap flags, you should theoretically be able to receive XML and use XSLT to transform it into comma-separated variable (CSV) format and load it up in your spreadsheet. When I started using Nmap, I wrote an XSL stylesheet to do that, and recently I've updated it to translate pretty much all the information I'm usually interested in. It goes like this:

<?xml version="1.0" encoding="UTF-8"?>
<xsl:stylesheet
    version="1.0"
    xmlns:xsl="http://www.w3.org/1999/XSL/Transform"
    xmlns="http://www.w3.org/1999/html">

    <xsl:output method="text" indent="no" encoding="UTF-8"/>

    <xsl:template match="/nmaprun">

        <!-- Headings -->
        <xsl:text>"Address",</xsl:text>
        <xsl:text>"Hostname",</xsl:text>
        <xsl:text>"RecType",</xsl:text>
        <xsl:text>"State",</xsl:text>
        <xsl:text>"Proto",</xsl:text>
        <xsl:text>"Port",</xsl:text>
        <xsl:text>"Service",</xsl:text>
        <xsl:text>"State",</xsl:text>
        <xsl:text>"Product",</xsl:text>
        <xsl:text>"OS Match",</xsl:text>
        <xsl:text>"OS Type/Vendor/Family/Gen"</xsl:text>
        <xsl:text>&#10;</xsl:text>

        <!-- Ports -->
        <xsl:for-each select="host/ports/port">
            <xsl:text>"</xsl:text>
            <xsl:value-of select="../../address/@addr"/>
            <xsl:text>","</xsl:text>
            <xsl:value-of select="../../hostnames/hostname/@name"/>
            <xsl:text>","</xsl:text>
            <xsl:value-of select="../../hostnames/hostname/@type"/>
            <xsl:text>","</xsl:text>
            <xsl:value-of select="../../status/@state"/>
            <xsl:text>","</xsl:text>
            <xsl:value-of select="@protocol"/>
            <xsl:text>","</xsl:text>
            <xsl:value-of select="@portid"/>
            <xsl:text>","</xsl:text>
            <xsl:value-of select="service/@name"/>
            <xsl:text>","</xsl:text>
            <xsl:value-of select="state/@state"/>
            <xsl:text>","</xsl:text>
            <xsl:value-of select="service/@product"/>
            <xsl:text>","</xsl:text>
            <xsl:value-of select="../../os/osmatch/@name"/>
            <xsl:text>","</xsl:text>
            <xsl:value-of select="../../os/osmatch/osclass/@type"/>
            <xsl:text> / </xsl:text>
            <xsl:value-of select="../../os/osmatch/osclass/@vendor"/>
            <xsl:text> / </xsl:text>
            <xsl:value-of select="../../os/osmatch/osclass/@osfamily"/>
            <xsl:text> / </xsl:text>
            <xsl:value-of select="../../os/osmatch/osclass/@osgen"/>
            <xsl:text>"</xsl:text>
            <xsl:text>&#10;</xsl:text>
        </xsl:for-each>

    </xsl:template>

</xsl:stylesheet>

This stylesheet can be used with Microsoft's XSL command-line transformation utility (msxsl.exe), which can be downloaded directly from Microsoft, here:

http://www.microsoft.com/en-us/download/details.aspx?id=21714

The msxsl.exe command line for Windows is:

> msxsl.exe portscan.xml nmap_xml_to_csv.xsl -o portscan.csv

Or you can use xsltproc on Linux:

$ xsltproc nmap_xml_to_csv.xsl portscan.xml --output portscan.csv

Or you can use Python or Perl or whatever. Knock yourself out.

As for how it works, the stylesheet simply uses the xsl:template element to match on the root element of the Nmap output (/nmaprun), the xsl:for-each element to iterate through ports, and Xpath expressions to pull the various host attributes out of the XML. The end result is nice and manageable:


Now you can filter on open ports, sort by host or service, and get a better look at your attack surface.

I haven't tested this with lots and lots of Nmap output, so there could be some corner cases I'm missing, but it's a start. The XSL stylesheet is reproduced in full above, but you can also find it (and other things) on my github:

https://github.com/strictlymike/tools/

For more about XSLT, I actually found w3schools to be pretty helpful:

http://www.w3schools.com/xsl/

Actually, I find pretty much all of their tutorials to be helpful. You should go and read them all. Enjoy!

Sunday, April 5, 2015

Watching Windows - Vim, Part 2

In a past article, I talked about getting Vim for Windows and using it for semi-scripted activities, and I've shared my Vim configuration. Another thing I find interesting about Vim is that you can open multiple windows in the same editor, either of the same file or of a different file. This comes in handy for multiple reasons, such as...

Opening Multiple Buffers

The first use is to open two files.  This can be done on the command-line with the -o (horizontally split windows) or -O (vertically split windows) argument:

gvim -O file1 file2

Or directly in Vim, with the :new command:

:new file2

Splitting Windows

Like Microsoft Office and other editors, Vim allows for multiple views of the same buffer.  It does this by supporting the split command:

:split

If you prefer to view windows side by side, then use the vertical split command:

:vsplit

Getting Around

If you're familiar with the typical Vim commands for getting around (hjkl), prepend a Ctrl-W to each to move between windows.  That is, to move to the next window to the left, down, up, or right, respectively, type:

Ctrl-w, h
Ctrl-w, j
Ctrl-w, k
Ctrl-w, l

If, on the other hand, you mean to move the windows themselves, then simply capitalize the motion direction, as follows:

Ctrl-w, H
Ctrl-w, J
Ctrl-w, K
Ctrl-w, L

If you want to shut everything else out except the window you are looking at, the underscore and pipe window commands will respectively do so in the vertical and horizontal directions:

Ctrl-w, _
Ctrl-w, |

To decrease or increase the size of a window in the vertical dimension, use the minus and plus window commands, respectively:

Ctrl-w, -
Ctrl-w, +

And to decrease or increase the size of a window in the horizontal dimension, use the less-than and greater-than window commands:

Ctrl-w, <
Ctrl-w, >

To bring everything back into equality, use the equals window command:

Ctrl-w, =

And for more about window commands, check out:

:help ctrl-w

Diffing

If you want to diff multiple files from the command-line, use the -d argument:

gvim -d file1 file2

The result will be a color-coded view highlighting the differences between files.


To view the differences of two or three files that have already been loaded in an existing session of Vim, use the :diffthis command in each applicable window:

:diffthis

And to turn off diffing,

:diffoff

So there it is.

Sunday, March 29, 2015

B64

If you do web application work or malware analysis, you're bound to run into base64-encoded data.  For debugging purposes, it can be useful to decode (and encode) this data.  Linux has a utility named base64 for such things.  Windows does not, but the .NET System.Text namespace contains at least two relevant functions:

Convert.ToBase64String(byte []);
Convert.FromBase64String(string);

With not much work, you can create a quick utility like the base64 utility in Linux, but for Windows.  You can also use the .NET clipboard APIs to make the utility capable of conveniently translating data directly within the clipboard.

Featured here is a quickie utility for working with base64 encoding in various formats (command-line arguments, standard input/output, and clipboard).

The utility has issues encoding and decoding itself because it uses ReadLine() and doesn't read the entire input stream.  Perhaps using OpenStandardInput().Read(...) would alleviate this.  In any case, the example is provided as-is.

Sunday, March 22, 2015

Snooze

When I was in high school, I used to set a sleep timer and an alarm on my stereo and fall asleep to music, then wake up to it again in the morning.  Once I got into college, I did the same thing with .BAT files that would stop and re-start WinAmp (those were the days).

A couple years ago, to my wife's dismay, I remembered how much I enjoyed this, and wrote some scripts for Linux to not only stop and start different music but also fade the volume out so the sleep timer didn't abruptly wake me up, and back in so that the wake-up experience was a little more pleasant.  Soon after, I re-did this all as a Windows HTA (HyperText Application), and finally I re-did it this month in JavaScript so that it would work with Windows 8 and have a gradient.  It looks like this:


I call it "fade" because it fades music in and out, in addition to being a nice sleep / wake timer.  You can download the code at https://github.com/strictlymike/fade and follow along if you're interested.  Or, just save fade.hta to your computer and run it.  If it doesn't work for some reason, feel free to contact me, or use your HTML/JScript skillz to figure it out.  Cheers.

Getting Faded

If you know HTML, it's reasonably simple to get started.  You might want to know about this little guy, though:

    <meta http-equiv="x-ua-compatible" content="IE=edge" /> <!-- Gradients -->

Without him, you can't have gradients.  Though, if you use him, you have to use JavaScript -- VBScript has been eliminated.

The UI is a designer's nightmare, but here it is:

The BODY tag has an onload function to initialize the UI, and an oncontextmenu function that disables right-click:

    <body onLoad="onLoad()" oncontextmenu="return false">

The CSS includes a gradient and disables the scroll bar with the overflow: hidden directive:

    <style>
        body { background: linear-gradient(#000044, black 100%);
                                    overflow:          hidden;        }
    </style>

Another SELECT element is pre-populated with times that don't fall within nice, easy increments of 15 minutes:

                <select style="width: 100%;" name="selOffTime">
                    <option value="-1">Never</option>
                    <option value="0">Immediately</option>
                    <option value="0.25">15 seconds</option>
                    <option value="1">1 minute</option>
                    <option value="5">5 minutes</option>
                    <option value="10">10 minutes</option>
                    <option value="15">15 minutes</option>
                    <option value="20">20 minutes</option>
                </select>

The rest are calculated within the body's onLoad() function:

        for (min=30; min<240; min+=15) {
            opt = document.createElement('OPTION');
            if (min == 60) {
                opt.textContent = '1 hour';
            } else if (min > 60) {
                opt.textContent = (min/60).toString() + ' hours';
            } else {
                opt.textContent = min.toString() + ' minutes';
            }
            opt.value = min.toString();
            selOffTime.add(opt);
        }

An INPUT element is pre-populated with a likely (or is it unlikely?) wakeup time, and given an onchange handler:

                    onChange="updateOnTimerLabel()" name="txtOnTime"/>

Another INPUT element, of type "file", is added to permit selection of MP3 files or playlists:

    <input type="file" style="width: 100%;" name="fileToPlay"></input>
    <br/>

A start and cancel button are present, and each has a respective onClick handler:

                <button style="width: 100%;" onClick="start()"
                    name="btnStart">Start</button>

Finally, a status bar is at the bottom, with a black background to match the ending color of the linear gradient defined in the CSS:

    <div id="divStatusBar"
        style="color: white; background-color: black; font-weight: bold;">
        Loading...</div>

If you're a designer or just enjoy attention to detail, take a moment to appreciate the fact that I not only included my CSS in a <style/> tag, but also took the time to mix it with inline CSS using the style=... attribute for each element.

In my onLoad() function, I take care of initialization: resizing the window, instantiating COM objects, updating the label for the sleep time, setting the progress bar update timeout, and adding options in increments of 15 minutes to the timer select box.

The rest is triggered largely through the start() function, wherein I check whether a valid playlist or MP3 was selected for waking, and schedule fade-out and fade-in of the music.

When the sleep timer expires, fadeOut() is called, which in turn schedules nudgeDownWrapper() to be called ever two seconds.  The role of nudgeDownWrapper() is to send a keystroke event for the media volume down button (see https://msdn.microsoft.com/en-us/library/windows/desktop/dd375731%28v=vs.85%29.aspx) and count how many times this is done, finally sending a keystroke event for the media stop button.  The volume only needs to be decreased 50 times before it is certain to be muted, so that is how many times it is decreased.

If there is a wake timer, then after it expires, Windows Media Player is invoked with the playlist or MP3 as an argument, and nudgeUpWrapper() gets called to do its thing with volumeUp() several times.

I had another version that was media player-agnostic, but this simpler version is all that most people will need to get started building their own.

Rock_on.


Monday, March 16, 2015

Sniffing Paste

Copying from a web page and pasting into a Word document will usually copy not only the data but also the yucky web page formatting.  Most times when I paste data, I just want the data, not the formatting.  For some time I've been using a trick to get around this, using applications that are unaware of formatting as a clipboard filter.  For example, pasting into the Windows Run dialog (Ctrl+C, Win+R, Ctrl+V, Ctrl+A, Ctrl+C, Esc, Alt+Tab, Ctrl+V), or into Notepad for larger buffers.  These tricks do get rid of the formatting, but they are frickin' tedious.  Some apps do have a "Paste Special" option that I could use instead, often accessible with Ctrl+Shift+V.  But, some don't (Word 2007, I'm looking at you).

Word to your Mother

So I wrote a quick and dirty tool to take care of that problem, with MS Word, and with anything else.  I call it StripClip, and all it does is go get the contents of the clipboard and put them back again as plain text.  Here's an example, where the first paragraph was pasted directly (see the formatting?) and the second was filtered through stripclip:


How?

Simple.  Just scrape the code sample from MSDN and you're off:

 1 // Adapted from:
 2 // https://msdn.microsoft.com/en-us/library/kz40084e%28v=vs.110%29.aspx
 3 using System;
 4 using System.Windows.Forms;
 5 
 6 class Unformat
 7 {
 8     [STAThreadAttribute]
 9     static public void Main()
10     {
11         try
12         {
13             StripClipFormatting();
14         } catch (Exception) { }
15     }
16 
17     static public void StripClipFormatting()
18     {
19         String text = Clipboard.GetText(TextDataFormat.Text);
20         Clipboard.SetText(text, TextDataFormat.Text);
21     }
22 }

(Also available here)

Shortcutting

To make this convenient, build a copy of it using the C# compiler and stick a shortcut to the resulting executable on your desktop, taking care to set up a shortcut key for the shortcut, as follows:


I favor Ctrl+Shift+C, because it's mnemonically close to Ctrl+C (copy).  But you can do whatever you want.  Enjoy!

Sunday, March 1, 2015

Not Exactly Charming

I've been annoyed with charms menu.  Most of the time, it extends in front of legitimate controls I am trying to click in my browser, evoking the "I'm TRYING to $@#!ing work here!" response from me.

A month ago, I found windows.immersiveshell.serviceprovider.dll in Process Explorer, and wondered if this had to do with the Charms bar.  I looked it up, and found an article that describes steps to use SysInternals' Process Explorer to terminate the thread that is running code within this "Immersive Experience" library.  In closing, the author states that using Process Explorer is not automatic (it entails user interaction), and that s/he hopes someone finds an effective way to disable the immersive start menu.

I found another article suggesting that the Registry affords this functionality.  I tested it, finding that it indeed does.  The relevant registry keys are:

[HKCU\Software\Microsoft\Windows\CurrentVersion\ImmersiveShell\EdgeUi]
DisableTLCorner=1
DisableCharmsHint=1

I also think that following the advice I found of right-clicking the taskbar to arrive at Properties and selecting the Navigation tab may have helped me locate a control to add another registry entry that has reduced the annoyance factor of the Windows 8 UI.  The relevant registry key was:

[HKCU\Software\Microsoft\Windows\CurrentVersion\ImmersiveShell\EdgeUi]
DisableTRCorner=1

A command script for making all these changes at the same time follows:

REG ADD HKCU\Software\Microsoft\Windows\CurrentVersion\ImmersiveShell\EdgeUi /v DisableTRCorner /d 1 /f
REG ADD HKCU\Software\Microsoft\Windows\CurrentVersion\ImmersiveShell\EdgeUi /v DisableTLCorner /d 1 /f
REG ADD HKCU\Software\Microsoft\Windows\CurrentVersion\ImmersiveShell\EdgeUi /v DisableCharmsHint /d 1 /f

Nevertheless, I thought I'd see if I could implement something similar to the "Kill Thread" function in SysInternals' process explorer.  The result can be found here on my Github:

https://github.com/strictlymike/charmkiller

It is based on the following two articles:
What didn't initially occur to me was that there is no API for enumerating threads associated with a particular module.  There is, however, the fact that a thread has a start address property that indicates what code was first executed when the thread was started.  As long as no indirection is incorporated (such as a dispatch function that uses arguments to determine what code is subsequently executed), and no tampering has been undertaken by the target process for any reason such as obfuscation (not sure if this structure is in the PEB or kernel), it is possible to classify a thread as being associated with a particular library by assessing whether the thread's start address lies within the base and end address of that library.  So, that's what I did.  Thanks, Rohitab!  See the code for more details.

The end result was a program that is capable of locating and terminating the thread that handles Immersive Experience events such as the charms menu.  Alas, that thread also handles things like wireless network configuration and the start menu which I commonly use to invoke programs whose locations I do not know, such as the Windows SDK prompt.  So, I would recommend trying the registry maneuvers first, restarting explorer to evaluate.  Regardless, the source code for the project I created could still be useful in the general sense for terminating specific threads in arbitrary processes.  Not sure I can think of an example, but nonetheless, it's out there, just in case ;-)