Sunday, April 19, 2015

Vim Script Quick Tip

Actually, this is about macros, but "macro" didn't rhyme with "quick", so deal with it.

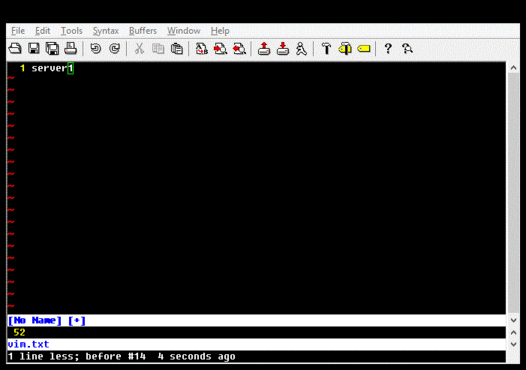
The other day, a colleague asked me if I knew of a quick way to generate a list of hexadecimal numbers from 0000 through ffff. And I do, in Vim:

  • Start the buffer with 0x0000
  • Start a new macro using q and choosing any buffer name you like (I tend to go with d out of habit)
  • Yank the whole line
  • Paste it
  • Increment it using ctrl-a
  • Terminate macro recording
  • Execute the macro 65534 times
The commands look like this:

a0x0000
qd
yy
p
ctrl-a
esc
65534@d

And if you don't want the 0x prefix, then remove it using a single replace command:

:%s/0x//g

The reason I use the 0x prefix is to tell the ctrl-a (increment) command that the number format is hexadecimal and not octal, without having to diddle with the nrformats option.

On the other hand, if you increment numbers that are not prefixed, Vim will assume they are decimal, like this:


Also, if you want to decrement (as opposed to increment) numbers, you can use ctrl-x.

Happy Vimming.

Sunday, April 12, 2015

Dealing with Nmap output

Port scans of multiple hosts typically result in a lot of information that I'd rather have in a spreadsheet. If you use the -oX or -oA Nmap flags, you should theoretically be able to receive XML and use XSLT to transform it into comma-separated variable (CSV) format and load it up in your spreadsheet. When I started using Nmap, I wrote an XSL stylesheet to do that, and recently I've updated it to translate pretty much all the information I'm usually interested in. It goes like this:

<?xml version="1.0" encoding="UTF-8"?>
<xsl:stylesheet
    version="1.0"
    xmlns:xsl="http://www.w3.org/1999/XSL/Transform"
    xmlns="http://www.w3.org/1999/html">

    <xsl:output method="text" indent="no" encoding="UTF-8"/>

    <xsl:template match="/nmaprun">

        <!-- Headings -->
        <xsl:text>"Address",</xsl:text>
        <xsl:text>"Hostname",</xsl:text>
        <xsl:text>"RecType",</xsl:text>
        <xsl:text>"State",</xsl:text>
        <xsl:text>"Proto",</xsl:text>
        <xsl:text>"Port",</xsl:text>
        <xsl:text>"Service",</xsl:text>
        <xsl:text>"State",</xsl:text>
        <xsl:text>"Product",</xsl:text>
        <xsl:text>"OS Match",</xsl:text>
        <xsl:text>"OS Type/Vendor/Family/Gen"</xsl:text>
        <xsl:text>&#10;</xsl:text>

        <!-- Ports -->
        <xsl:for-each select="host/ports/port">
            <xsl:text>"</xsl:text>
            <xsl:value-of select="../../address/@addr"/>
            <xsl:text>","</xsl:text>
            <xsl:value-of select="../../hostnames/hostname/@name"/>
            <xsl:text>","</xsl:text>
            <xsl:value-of select="../../hostnames/hostname/@type"/>
            <xsl:text>","</xsl:text>
            <xsl:value-of select="../../status/@state"/>
            <xsl:text>","</xsl:text>
            <xsl:value-of select="@protocol"/>
            <xsl:text>","</xsl:text>
            <xsl:value-of select="@portid"/>
            <xsl:text>","</xsl:text>
            <xsl:value-of select="service/@name"/>
            <xsl:text>","</xsl:text>
            <xsl:value-of select="state/@state"/>
            <xsl:text>","</xsl:text>
            <xsl:value-of select="service/@product"/>
            <xsl:text>","</xsl:text>
            <xsl:value-of select="../../os/osmatch/@name"/>
            <xsl:text>","</xsl:text>
            <xsl:value-of select="../../os/osmatch/osclass/@type"/>
            <xsl:text> / </xsl:text>
            <xsl:value-of select="../../os/osmatch/osclass/@vendor"/>
            <xsl:text> / </xsl:text>
            <xsl:value-of select="../../os/osmatch/osclass/@osfamily"/>
            <xsl:text> / </xsl:text>
            <xsl:value-of select="../../os/osmatch/osclass/@osgen"/>
            <xsl:text>"</xsl:text>
            <xsl:text>&#10;</xsl:text>
        </xsl:for-each>

    </xsl:template>

</xsl:stylesheet>

This stylesheet can be used with Microsoft's XSL command-line transformation utility (msxsl.exe), which can be downloaded directly from Microsoft, here:

http://www.microsoft.com/en-us/download/details.aspx?id=21714

The msxsl.exe command line for Windows is:

> msxsl.exe portscan.xml nmap_xml_to_csv.xsl -o portscan.csv

Or you can use xsltproc on Linux:

$ xsltproc nmap_xml_to_csv.xsl portscan.xml --output portscan.csv

Or you can use Python or Perl or whatever. Knock yourself out.

As for how it works, the stylesheet simply uses the xsl:template element to match on the root element of the Nmap output (/nmaprun), the xsl:for-each element to iterate through ports, and Xpath expressions to pull the various host attributes out of the XML. The end result is nice and manageable:


Now you can filter on open ports, sort by host or service, and get a better look at your attack surface.

I haven't tested this with lots and lots of Nmap output, so there could be some corner cases I'm missing, but it's a start. The XSL stylesheet is reproduced in full above, but you can also find it (and other things) on my github:

https://github.com/strictlymike/tools/

For more about XSLT, I actually found w3schools to be pretty helpful:

http://www.w3schools.com/xsl/

Actually, I find pretty much all of their tutorials to be helpful. You should go and read them all. Enjoy!

Sunday, April 5, 2015

Watching Windows - Vim, Part 2

In a past article, I talked about getting Vim for Windows and using it for semi-scripted activities, and I've shared my Vim configuration. Another thing I find interesting about Vim is that you can open multiple windows in the same editor, either of the same file or of a different file. This comes in handy for multiple reasons, such as...

Opening Multiple Buffers

The first use is to open two files.  This can be done on the command-line with the -o (horizontally split windows) or -O (vertically split windows) argument:

gvim -O file1 file2

Or directly in Vim, with the :new command:

:new file2

Splitting Windows

Like Microsoft Office and other editors, Vim allows for multiple views of the same buffer.  It does this by supporting the split command:

:split

If you prefer to view windows side by side, then use the vertical split command:

:vsplit

Getting Around

If you're familiar with the typical Vim commands for getting around (hjkl), prepend a Ctrl-W to each to move between windows.  That is, to move to the next window to the left, down, up, or right, respectively, type:

Ctrl-w, h
Ctrl-w, j
Ctrl-w, k
Ctrl-w, l

If, on the other hand, you mean to move the windows themselves, then simply capitalize the motion direction, as follows:

Ctrl-w, H
Ctrl-w, J
Ctrl-w, K
Ctrl-w, L

If you want to shut everything else out except the window you are looking at, the underscore and pipe window commands will respectively do so in the vertical and horizontal directions:

Ctrl-w, _
Ctrl-w, |

To decrease or increase the size of a window in the vertical dimension, use the minus and plus window commands, respectively:

Ctrl-w, -
Ctrl-w, +

And to decrease or increase the size of a window in the horizontal dimension, use the less-than and greater-than window commands:

Ctrl-w, <
Ctrl-w, >

To bring everything back into equality, use the equals window command:

Ctrl-w, =

And for more about window commands, check out:

:help ctrl-w

Diffing

If you want to diff multiple files from the command-line, use the -d argument:

gvim -d file1 file2

The result will be a color-coded view highlighting the differences between files.


To view the differences of two or three files that have already been loaded in an existing session of Vim, use the :diffthis command in each applicable window:

:diffthis

And to turn off diffing,

:diffoff

So there it is.